 subjects to show you a little of the project the owners of our company have been working on all summer. As any of you who've come to Comm-Tech for training know, for about two years now our main office has been in Frederick, Colorado. It's a nice town, but everything was at least 5 miles away. It took a long time to go out to lunch, and if you wanted to run some errands during the lunch hour - well, forget it, you couldn't. We were on the frontage road of I-25 between Highways 52 and 119. But now we've moved to Boulder!
On the above map from Google I marked the two locations.
Here's a few pictures of the progress of our new building. It is so nice!


This is one of the future classroom, taken as I was standing in the front where I would normally stand. We'll have our coffee and snacks on that countertop.
On the right is my future office - notice the window? I took those 2 photos on September 3rd. When you visit us you'll see the huge progress we've made!
 These next 2 were taken while we were in the moving process. What a huge job that was! One is the open office area, the other is looking at the balconey through the boss's office door.

We moved into the building on September 8th. We worked our heads off, but there was still an awful lot of work to do.
The photo of them hanging the screen for the projector looks a little surreal, doesn't it?
Here's the new kitchen, we'll have plenty of space for you all to eat your lunches there during  class. Within walking distance is a PDQ station with a Subway inside, and across the street is a hotel (for out-of-town students) with a wonderful restaurant inside, the Eggcredible Cafe.
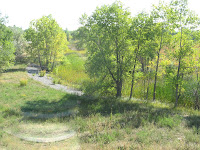
 class. Within walking distance is a PDQ station with a Subway inside, and across the street is a hotel (for out-of-town students) with a wonderful restaurant inside, the Eggcredible Cafe.
These trees are what you see outside the kitchen window. Makes a nice change from gazing at the semi trucks on I-25.
 Today I took this picture of the classroom they've named Cherryvale Trail - it's all finished. Most of the time the AutoCAD classes will be in this room, and the Civil 3D, Map and Land Desktop classes wil be in the other one, named Mapleton Hill. Everything is set up and ready to go!
Below is the view of our building looking west on South Boulder Road. I realize when you're driving here you won't quite see this view, since you'd have to be in the wrong lane. But I
 wanted you all to notice at the bottom of the photo is an entrance to some of Boulder's hiking
  trails. I got this map that shows this entrance and some of the nearby trails from the City of Boulder's website.
On the right is a picture of the new building taken from the corner
 of South Boulder Road and Manhattan Circle, looking east.
Today was a beautiful day, so I climbed up onto the roof parapet and took this photo of the Flatirons. We all love looking at the mountains. We're sure you'll love our new training center, with it's bigger classrooms, better kitchen, and its more convenient & attractive location. I sincerely hope you come to the Open House on Friday the 21st!


