Yesterday I did a review of how to create Annotative Styles, in Text, Dimensions and Multileaders. It's pretty obvious that these styles are worse than useless if you don't know how to use them, so let's get right into that.
You can put Annotative Dimensions, Text and Multileaders in your drawing either in Model space or Paper Space through a scaled viewport. The benefit of putting these objects in through a viewport that has already been scaled is that you are already sure what your viewport scale is going to be, so you don't have to wonder. Also, you won't forget to set the scale, which frequently happens when adding Annotative Objects while in Model space.
That being said, most people I talk to put their notes and dimensions on their drawing long before they get it set up to print, so we need to look at both ways of doing this.
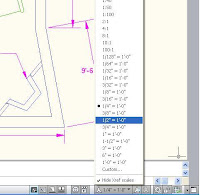
In Model Space, before you add notes or dimensions, choose the scale at which you want these objects to plot. In the lower-right corner of your screen, on the status bar, you can see the current scale. If you've never changed it, the default is 1:1. In the picture I've selected the flyout arrow, my current scale is 1/4"-1'-0", and I'm about to change it.
Notice the little button to the right of the Annotation Scale button. It is the Annotation Visibility button, and it controls whether you can see every Annotative object (ON) or only the ones that have the current scale (OFF). When you click this button, the light bulb changes from lit up (on), to dark grey (off), and on your command line you'll see
Command: ANNOALLVISIBLE
Enter new value for ANNOALLVISIBLE <0>: 1If you prefer, you can type that command in, so then you need to know that 1=On, 0=Off
Take a look at these pictures, and notice how in the one with the light bulb icon 'on', you can see dimensions and notes of different sizes, but when the light goes dim, you can only see Annotative objects that have the current scale assigned to them:
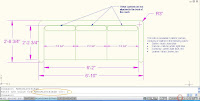

In this next picture, notice how it looks when I leave the light bulb off and change the current scale in the list.

All the Annotative items created at the scale of 1:10 no longer show, and the ones with the 1:20 scale assigned to them are now visibile.
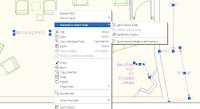
If you need certain Annotative objects to show in more than one scale, there are several ways you can make that happen. My first choice when I'm in Model space is to select the objects to which I want to add a scale, right click, and select either "Add current scale" - that's pretty self-explanatory - or select "Add/Delete Scales". You can add one or more scales to all the annotative
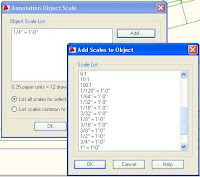
objects you've selected.
As you can see from the picture above, they can be different types of objects and it still works. After you do this, these will all show up in any viewport that has that scale assigned to it. From this same menu, you can also delete any assigned scales. The Delete button is right below the Add button.
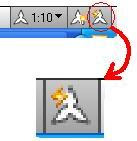
Another way to add scales to Annotative objects is with the ANNOAUTOSCALE command. It's the button in the picture - but be very careful with this button! If you have this on, as it looks in the picture, and you change the scale showing on the status bar, it will add the new scale to EVERY Annotative object you have!
Everything, even if it's on a frozen or locked layer.
See the mess I made with this button! The Dimension layer was frozen,
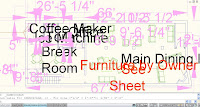
and the Notes layer (red) was locked. Thanks be that there is an "Undo" button!!
Another way to create Annotative text, dimensions or multi-leaders is to first set up your sheets, create the viewports you need, set their scales and lock them. Then on your layouts, double-click inside any viewport to put yourself in Model Space. When you put notes or dimensions in your drawing this way, they automatically are created at the proper scale.
In this last picture, the Annotative text, dimensions and multileaders were put in through the viewports. You can really see the benefit of using Annotative text
(I HOPE!) because even though
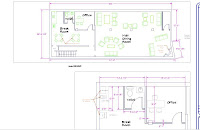
these viewports are at different scales, the dimensions in each one print out at the same size, as do the room names. You may notice that the room names have two scales assigned to them, so they show up in both viewports. Nevertheless, I was able to adjust the position of each word so it fit in the room.
 What a change!


