 Hi Everybody
I promised more info on Tables, and here it is! I bet you're falling off your chair in amazement that I am posting again so soon. Well, I've been meaning to write in this blog more often, but it's more like a New Years Resolution than a promise. So I'm working on it.

Today I'm going to show you how to create a table by extracting data from your drawing. I've inserted some blocks with invisible attributes into this tiny office drawing, hopefully this will give you ideas for applying this to your own projects. I'm going to make a table that lists all the furniture I'm putting into this 'office remodel'. The Attributes I added to each block are the Manufacturer and the Price.
The first step is to start the TABLE command, whichever way you want to get to it. Then instead of choosing how many columns & rows you want, click on the button for "Object Data in the drawing (Data Extraction)" -shown in the next picture

 Once you do that, it asks you to create a new .dxe file. AutoCAD refers to this for creating and updating your table, so make sure you put it in a safe place and give it a name that makes sense.
Next you'll be on Step 2, Define Data Source. Here is where you pick whether it's just objects from this drawing or if you want it to grab information from several drawings. You also have a Settings button on the second screen, where you can tell AutoCAD whether or not you want it to look in Model space, Xrefs, & blocks.
 Step 3 lets you decide which kinds of objects you want in your table. You can have it just find lines and circles, or all blocks, or only blocks with attributes if you want.
Then in step 4 you refine it further; there are 5 category filters to apply, to decide which things you want in your table. For example, under the Geometry filter you could have the X,Y, and Z
 coordinates of your blocks show up. (There must be someone out there who needs to have this information in a table) Under the Drawing filter, you can have your filename, filesize, & 'saved by' all show up in your Table.
I went with just the Attributes for my table.
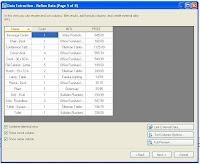
In step 5, you can rearrange the order of the columns by dragging them . If you click at the top of the column, that will sort your table according to that column,
 and you can toggle it between Ascending and Descenging. You also can right-click on any column and hide it. All these things can't be done once it's inserted into your drawing.
I dragged the Count column over to the right, and sorted by Block name.

In the picture towards the right here I've got steps 6, 7 & 8. In step 6 you decide whether you want your table in the drawing or as an external file. You choose the Table Style and give it a Title in Step 7.
Step 8 is just clicking on the Finish Button.
 Then you pick a spot in your drawing, voila, a beautiful table. Next time I'll talk about some things you can do to your table once you've created it. See you soon!


No comments:
Post a Comment