Wednesday, December 24, 2008

A Little Rotation Tip

Hi folks, today's a half-day at the office here, with not much going on - lots of people on vacation this week! I was just in the mood to write a little note to all of you. I meant to include this quick tip about an option in the Rotation command when I wrote about offset, but that subject just got too long. This Rotation tip is one of those things that works pretty slick. Slick as a country road in the winter...

Let's say you have an object that has been drawn at an angle, and it should be lined up with something else in your drawing. In my example I have what I'm calling a property line, and I want to line up this rectangular object to be at the same angle. You can imagine this thing to be anything you please; a tool shed, chicken coop, hot tub, garden plot, whatever. I put it in at an angle, but now things have changed and the angle is wrong.

In order to get the rectangle rotated to the same angle as the property line, I could find out what angle each one is rotated to now, and do the math to figure out how many degrees I need to rotate it to match. And then of course I'd have to adjust it, because it would be off by some fraction of a degree - you can pretty much count on that!
The easier way is to start the Rotate command, pick your base point as usual, and then you'll see "Specify rotation angle or [Copy/Reference] <0>:" so now choose the [Reference] option.

Next, to specify the reference angle, use your Osnaps to pick on two points on the object you're about to rotate.


Notice your command line says "Specify the new angle or [Points] <0>". If you knew the angle at which you wanted your object to end up rotated, you could type it in here, hit enter and you're done.

But my tip is for when you don't know that angle -then you choose the [Points] option, and pick two points on the line that is at the angle you want your object to match. ( I used the Nearest Osnap option to be sure I picked exactly on the line)


BANG! Your object will be rotated at the same angle as that line.

Easy as pie, right?


I hope this was helpful to some of you, whether beginners who've never seen it, or anyone who never noticed this cute little option when it came out in 06.
You might also want to play with the [Copy] option.

It's almost time to go home, and we have tomorrow off - I'm so glad!

I'll give you a hint at what I'm going to be doing with my free time...

Monday, December 22, 2008

A Little Text Thing

Hi all! Great weather we're still having, eh? Especially all of you poor folks back east!

I wanted to add a couple tiny tips about text, one new for 2009, the other is old but you may not know about it.

In this picture I have an Mtext object, I just made it on Friday when I was showing someone how fields work. There is some text I typed and a Date field, formatted so that every time I saved the drawing, he could see the seconds update, to show just how cool these fields are!
Cool as North Dakota in the wintertime! And you could say that North Dakota is one Big field!
Of course, you could say the same thing about eastern Colorado, or Kansas, or Nebraska, etc, etc.

Today, I double clicked on the text and started to change it. I wanted the note to be different, and I didn't want the field to update any more. One of the new features of the AutoCAD 2009 ribbon is when you're in the text editor, the ribbon automatically changes to a text editing ribbon. If you don't pay attention you might not even notice it.

In the picture you'll also notice that I have Spell-check ON, it's blue. When I misspelled a word, now the Text Editor underlines the word in red, just like most word processing software now. Also, if you right-click exactly on that underlined word, a list of possible words you might have meant to type is there in your right-click menu. (another reason to start using right-click menus!) I purposely misspelled "created" as "creatid" and it gave me "created" which was exactly what I wanted, plus a few other odd words. If the automatic spell-check bothers you, just click the spell-check button to turn it off.

But please, for your own sake, do a spell check before you send any drawings out! It's such a simple thing to do, and you look the opposite of intelligent when you send out documents with misspelled words in them. I'm sure I've done that here in this blog, and I'm sure you've noticed it! Spelling errors stand out!

The next thing I did in the text editor is select the Date field, and right-click. The old thing I meant to tell you about is that you can change a field into text.

If you used a field to get information from an object - or in this case, a certain date - and you don't want it to keep updating, right-click on the field and choose "Convert field to text". That is exactly what it does, so now you have text where there once was a field. You can edit all or part of it just like any other bit of text.


I hope someone, somewhere said "I never knew you could do that!" Maybe someone who is outstanding in their field, even.

Thursday, December 18, 2008

No More Late Nights in the Office

Have you ever had a deadline that meant you had to stay at the office until the project was finished, no matter how late it got? I know it can be exciting in a scary-movie kind of way to be alone in an office building late at night, long after even the cleaning crews have gone home...or not! Honestly, I'd rather be home at night. Even if I have work to finish I like it better if, once the job is finally done, my commute consists of walking from my desk to my bed!

If the place where you work has their AutoCAD products on Subscription, and you work for a commercial business (not, for example, an educational facility or Autodesk Reseller) and you have a decent home computer, there is another benefit to you that I think you will truly like. It's called Home Use, and it's only available to Autodesk subscription customers.

What it means is that you, as the licensee of the software, may install a second copy of the program at a second location away from your office location under the following conditions: (and I quote)
--Such second location may include installation on a computer located at the home of an employee or on an employee’s personal computer.
--The use of the software when installed at such second location shall be to produce work related to your internal business needs or for your employee’s personal education or training needs.
--
This Home Use benefit applies only for as long as your software is on subscription and only to the number of licenses of the program that are on subscription.

Even if your AutoCAD products are on a network license, you can still do this, you just have to apply for a companion stand-alone serial number. This will work as long as your subscription is current, and a company can do this for as many licenses as they have.
Most of the Autodesk products are eligible, except enterprise/server-based products and those that do not require activation. Only commercial licenses are eligible, as I said before. NFR (Not for Resale) and EDU (Education) licenses are not eligible, so if you work for a school or an Autodesk reseller, don't try this at home. If my experience is anything to go by, most of those folks have laptops anyways, and are constantly bringing work home...kind of takes the fun out of it, doesn't it?
CORRECTON! I made a mistake when I first wrote this, I stated that it wasn't available for Government offices. It is.
This benefit IS available to you if you work for a government office. Only NFR and EDU licenses don't have this option. All the rest are considered commercial, even though their purchasing is done differently than, say, a construction company, the licenses themselves are considered commercial.

Monday, December 15, 2008

Meet Some Old Options

I'm in the deep freeze today, like a lot of you all over the United States - did the weather ever change! In my town in Colorado it got up to 55 degrees F last week, it was such an unexpected gift...Then the big snow on Saturday, and now this morning it was -14! The drive in to work today was slow and painful, with the roads covered in snow that had been packed down and then frozen solid. However, when I saw the reports from all the ice storms in the east - where they're without power and heat - I know I better not complain! (It reminds me of what my children used to say, "I'm not complaining, I'm just mentioning.")

I was thinking it would be great if I could gather all the little-known improvements to AutoCAD into a one-day class. It would even be useful to anyone working in one of the specialized versions, like Architecture or Civil 3D. They spend so much time learning the software, and then the big changes each year, plus trying to finish drawings and beat deadlines, they truly don't have much chance to do anything else. It'd also be useful as an update class for folks who haven't upgraded in 5 years or so. But just to get you all feeling good, I'm going to mention a couple here today - maybe that'll warm you up.

Maybe if I type like mad, it'll warm me up!

So here's one little tidbit - from 2006 - did you know you can offset an object on to a different layer than the one it is on? When you first start the offset command, on your command line some of you will have noticed the line that reads, " Current settings: Erase source=No Layer=Current OFFSETGAPTYPE=0". So, there are 3 things you can set in the Offset command, let me tell you what they do.

If instead of typing in an offset distance, you choose the "Erase" option, and Yes, the object you offset will disapear, and a new one will be created at whatever distance you specified.

If you choose instead the "Layer" option, and change it from "Source" to "Current", your offset object will be created onto the current layer. This could really be useful; I often would offset things and then change their layer. In the picture, I offset the property lines 3' onto a different layer.

Notice that once you have chosen an object to offset, you can pick the Multiple option as well. This will continue to make offset copies of that object as many times as you click, all at that distance you specified, without needing to pick it again. Once you are in that option, you can undo one or more if you get a little click-happy and create too many.

In the Multiple mode, by hitting Enter, you accept the default option, which you see is "select next object". With this option, you can select a new object, and then offset it as many times as you like.


The thing to watch out for with these fine options is that once you set them, they stay set as long as you are in that drawing session. (by that I mean it stays that way until you close AutoCAD, even if you go into a different drawing...unless you reset it back) If you do start using them, eventually you'll get used to taking a quck glance at that old command line. It'll tell you every time which options are active.


Last of all is OFFSETGAPTYPE. Here is the explanation of what that System Variable does, straight from the Help files.

0 - Fills the gaps by extending the polyline segments
1 - Fills the gaps with filleted arc segments (the radius of each arc segment is equal to the offset distance)
2 - Fills the gaps with chamfered line segments (the perpendicular distance to each chamfer is equal to the offset distance)

This picture ought to explain it even better...I used the same distance for each offset, and changed that system variable each time. You can probably see why the default setting is 0.

Does everyone know that the space bar on your keyboard works as "Enter" ?? If you keep one hand on your mouse and one on your keyboard, this can save you lots of clicks. (Of course, in the Text Editor, the spacebar is the spacebar...) You don't have to take your hand off your mouse to go over to the Enter key, and you don't have to right-click and then choose Enter from the list. Just use your thumb to hit the Spacebar when you want to end a command, or restart the same one over again.

For those very experienced CAD users, who started out with "Right click is Enter" and refuse to change to using a right-click menu - my heart goes out to you, but get into the 21st century. We always have to change! Would you stick with a rotary dial telephone just because you grew up using one? (for the kids who've only known push-button phones - watch some old movies, you'll see what I'm talking about) There are so many good shortcuts on the right-click menu that you're truly handicapping yourself if you don't learn to use them!

AND check out some of those little-used options on often used commands - you might find some great old tools!

Friday, November 21, 2008

Gold Support to the Rescue

How Autodesk Subscription Gold Support Can Save Your Day

Yesterday I wrote extensively about the benefits of getting your Autodesk software on subscription, except I left out one important benefit. I had a good reason, so bear with me.
The benefit I left out was that with subscription you can log your own support requests with Autodesk. One of their techs will research your problem and email you. This could save you a lot of money, compared to buying a support block with your reseller. That support block time can just fly by if you have an odd problem. I wanted to write about this now, because even though this is a terrific benefit, it's even better with Gold Support.

Once you log in to Subscription Center, you can look at the benefits I talked about yesterday, or create a support request. What I hate about creating a support request online is that you have to disable the pop-up blocker every time (because who wants to leave that off? You'd go nuts with all the pop-up ads all day long). In this picture I showed how I did it. You might have more than one, and you have to disable all of them. I know it's a little thing, but there are days I just don't need any little annoyances! How about you?

But once you get through that, there's a simple form to fill out.


At the top of this second picture notice that the kinds of things you can get help with are listed- installation, product configuration and troubleshooting.

You also have the choice to allow your reseller to see your support request, so if you're working closely with them, they can be kept in the loop. After you've submitted the form, they'll get back to you with a solution, or perhaps more questions about the problem. It's a great benefit to Subscription members.

The down side is, if you're stuck, you can't get any work done until they have time to get back to you...

So, that brings me to one of the awesome benefits of Gold Support - You can phone them! You can call an Autodesk Tech for one-on-one real-time help with your AutoCAD problem.
From 9 to 5 in each time zone during the regular work week, and even weekend hours in certain areas, you can call in with a toll-free number. What could be sweeter?

In normal Subscription, there are several levels of people who can log in to the Subscription Center for help. The Contract Manager sets this up. With Gold Support, you can have up to 4 people who can call for support! There's even an option for more. I love that.

Another sweet benefit of Gold Support is the ability to run several versions of your software on one machine. OK, there are conditions you have to meet, but it's worth it. I bet everyone has had problems working with old drawings in new versions, or getting files from someone who is using a different version of the software. Eliminating these daily headaches would be ideal.


I just remember the days of struggling on my own, trying to figure stuff out with AutoCAD. Gold Support would have saved me many a stressful day if I had had this way back when!


For any of you that might be translating this page, let me mention that online help is available in many languages, depending on where you live. This chart shows which regions have online support in what language.

Thursday, November 20, 2008

Hidden Subscription Benefits

Many of you get your AutoCAD software through subscription, which means that you basically buy it for the full price the first time, and then every year you pay a much lower fee to get the next new version automatically sent to you. Even if you weren't in the habit of buying every new release, this is still a good bargain. But did you know how many other things you are entitled to by being on Autodesk Subscription? There's a lot with regular subscriptions, and with their new Gold Subscription program, there's even more.


You get to Subscription Center from the Autodesk home page, there's a link in the lower right corner. Once you've logged in, you can either create a Support Request, or access your subscription benefits. We'll save Support Requests for another day. The picture above is what the benefits page looks like.


Number 1 in my screen shot there is Product Downloads. These are very cool special tools that are only available to subscribers. There are a couple different ones for AutoCAD, as well as for most of the more specialized softwares like Map and Civil 3D.

Below is a partial list of the Product Downloads:


I think each of these could be a subject for a long article!


The next thing only available to Subscription members is on-line training. On my illustration, I labeled the two places you can get to these as 2. & 3.
I clicked on AutoCAD and took a look at the tutorials for the new 2009 features. They're good! If you can't get to an update class, this is really important stuff. I meet so many people who've never learned all the cool stuff that they add to AutoCAD every year, they just keep using the same tools. Usually when I show them the new stuff, they slap their foreheads and say "That would have saved me HOURS of work!" Seriously, they do!


So, to reduce forehead slapping and save yourself hours of work, take a look at these e-learning lessons.


Number four on my list is "Stoeckel on Subscription", which is a blog written by one of the experts of AutoCAD. Just to whet your appetite for checking this out, here's a bit of his introduction:


When you read a little of how long he's been working with AutoCAD and of all the things he's done, you'll be as glad as I am to read his blog.

You can learn a lot if you listen to smart people. He's one of them.


And I haven't even mentioned the extra benefits if you're a Gold Support member. More on that tomorrow!


Here's a link to the Glossary of all the subscription terms.

Wednesday, October 22, 2008

New Multileaders and Old Quickleaders

It's 3 in the afternoon and I just made a fresh pot of coffee, so I'm wide-awake and ready to roll through the rest of the day. This blog entry, like so many, comes from a problem one of our clients was having. Being the kind-hearted person that I am, I thought I'd be helpful to some unknown CAD operator out there and keep them from tearing their hair out in frustration. So here's my little tip about Leaders...

Last July, I wrote about the new Multileaders, one of the new features of 2008. I still think they're a huge improvement on the old Quickleaders, but there is a wrinkle I ought to have been aware of. When you use Multileaders, if the drawing is opened in an older version, the Multileaders become Proxy objects and might not be visible. ARRRGH!
So...
If you open it in AutoCAD 2007 and earlier versions, set PROXYSHOW to 1.
Here is a link to the official Autodesk solution - Take me to your Leader

This isn't exactly great news if you are collaborating on a project with someone who has 2007 (or even older!) AutoCAD products. What if they have to be able to edit these leader objects? You'll want to be able to insert the old style Quickleaders, right? I'm going to do a little review of how we create a custom toolbar using the Customizable User Interface, so we have a button for our leaders.
By the way, the old Quickleaders can be made to attach blocks, but that's a whole new subject.
For you real old-timers, excuse me, I mean for you very experienced CAD users - you can just type in QLEADER, and it will work like it used to. Quickleaders are visible and editable in older versions. If you're used to typing everything in anyhow, you can skip the rest of this entry. The rest is written for the new people who've just been learning this program, or for anyone who just doesn't feel comfy with the CUI.
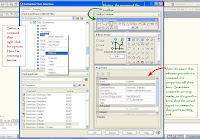
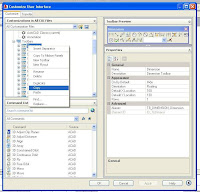
Type in CUI, and you'll see the dialog box come up as in the picture here. For an example, I'll copy the dimension toolbar and customize it with the buttons I use the most, and add the Quickleader button on it.
First of all, expand the toolbars and find the Dimensions toolbar, right click on it and choose Copy. Then right-click on the Toolbar heading, and choose Paste. The 'copy of Dimensions' toolbar will show up at the bottom of the list. Click on it to choose it, and right-click to find "Rename". If you're sharp eyed, you'll notice that I forgot to do this step. Oh well...

When you click on the plus in front of the toolbar name, it opens up so you can see everything that is on there. To remove buttons that you seldom or never use, right-click (again with the right-clicking!) and choose 'Remove' from the list of options. It only removes the command from that toolbar, not anything else at all.

To find a command that you want to add to a toolbar, type in as much of the command as you know, and the commands that contain those letters will start being filtered in the list below it. The Quickleader command shows towards the bottom when I type in "leader". When you see the command you want, just drag it up onto the toolbar and place it where you want.

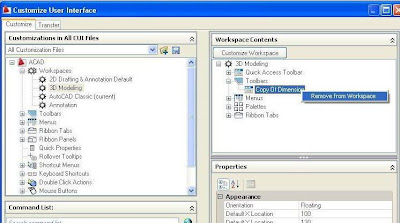
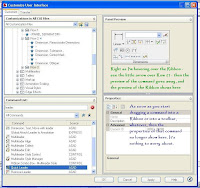
Now, whenever you make a new toolbar, it will appear in every workspace. The easiest way to get rid of it in workspaces where you don't want it is to stay in the CUI, click on each Workspace title in the upper left panel of the CUI, and notice that in the upper right panel you can see what toolbars, and ribbons, and so on, show up in that workspace. If you don't want this toolbar in your workspace full of ribbons, just right-click on it as I did in this illustration and remove it. It's easier to do it this way than to open each Workspace and delete it from there.

AND, you can just as easily add this or any other button to your existing ribbons, if you've become comfortable using them. You do all the steps as above, except you drag the command onto the proper Ribbon, and onto whichever row you want it to show up. Voilà! You just customized the new Ribbon, and it was a piece of cake!

Wednesday, October 1, 2008

Directions for the RegApp Cleanup Utility


Hello, this is part 2 of the RegApp Cleanup Utility.

I'm sure there must be at least one person who went to the link and downloaded the exe file, and now would like a little more help with this.

If you've never done this before, you might double click on the exe file and then wonder why nothing happens. So, here's what you have to do:
Once you download and run the .exe file (the one I sent you a link to in the last blog entry), it asks you where you want the files to be extracted. What it means is that the .exe file contains several files, and you need to tell it where to put them -so you can find them again- and then you'll have a few more steps to go through. So create a folder specifically for this.

According to the documentation, you need administrative privileges on your Windows operating system to install this, or get your administrator to do it for you. They love when we interrupt their day to ask them to do things like this.

If you have privileges, navigate to the folder and copy CleanupRegapp.exe, CleanupRegappRes.dll, and CleanupRegapp.html to the installation directory of your AutoCAD-based product. In my case, it was C:\Program Files\AutoCAD 2009

NOTE: To run this utility you must launch CleanupRegapp.exe from the installation directory of your AutoCAD-based product. Not from the folder you just made and into which you extracted everything.

To clean affected files:
1. Close all affected files. (Open affected files will not be cleaned!)
2. Launch the Regapp ID Cleanup Utility from the installation folder of your AutoCAD 2008 or AutoCAD 2009-based product.
If desired, in the Regapp ID Threshold field, enter a number to change the regapp ID threshold. Files that contain fewer regapp IDs than the threshold are not cleaned. The default regapp ID threshold is 50.
3. Under Files to Clean, select affected files. You can select individual files, folders, and subfolders.
To clean the contents of subfolders within a selected folder, select Include sub-folders.
To load and remove unreferenced regapp IDs from external references (xrefs) attached to the selected files, select Include Xref files.
4. Click OK. Cleaned files are saved in the same format last saved in.


One of the files you'll find, assuming you paid attention to what you named the folder, is CleanUpRegApp.html. This file gives you all the directions on how to install and use this Utility that I've shown you here.

NOTE: This utility cleans only DWG files saved in AutoCAD Release 14 and later file formats.

This utility makes cleaning up a bunch of drawings so much faster! In the previous blog entry, I told you how you could clean up one drawing at a time. This utility didn't even take 3 minutes to run. Imagine if I had had to open all 38 of these files and clean them up one by one! Using this utility, I could do this entire project in a fraction of the time. It's worth learning how to use it.

Monday, September 29, 2008

RegApp Cleanup Utitility

Hi again,
Have you ever gotten drawings from another company and they were enormous files for no discernible reason? Last week we had a client who was having strange problems with a whole lot of drawings. I enlisted the help of our Civil 3D instructor, Ken Martinez, and he showed me the difference between the typing in "purge" or "-purge" at the command line, as the only way to get rid of RegApps. You have a lot more control with "-purge".
Then just today, as a "Oh, by the way" comment today, Ken showed me this new Cleanup Utility on the Autodesk website, and I thought I ought to pass this along to you. I'm always looking for ways to eliminate headaches.

With this new Cleanup Utility, you can do a batch of drawings at once. Here's the link to the Autodesk page:
Excess Unreferenced RegApp IDs
RegApp Cleanup Utility

I did a little tiny bit of research, and found a good entry in the AUGI archives from 2006 that spells out better than I would how to use the purge command to get rid of invisible attached data from a drawing. It explains how it gets there and how to get rid of it. I copied the entry, (it's from 2006) and also credited the author. For cleaning up one or a few drawings, it's really easy.
From the AUGI website, in the Archives from 2006, is this tip on how to get rid of Xdata in a drawing. Written by Andy Manninen: (and I quote)

I would recommend to all AutoCAD users to run a -PURGE command, then select RegApps, * for all, and no to verify names. You may be surprised at what you will find... Regapps are added when you use certain software, and by implementing certain commands. If you purge these out you will find that your drawings will open much faster. I have not experienced any problems with purging the RegApps out because AutoCAD will generate these back as it needs them. With a clean drawing I have about 8 RegApps in my drawing. But I Have cleaned some that have around 157,000 RegApps. Cleaning that file, the size went from 3 MB to 400KB. The Main thing with RegApps in a drawing is that they act almost like a virus, if you xref in or insert an "infected" drawing, the RegApps propagate into the current drawing. That is why you need to make sure when you get files from an outside source you really should clean out the RegApps. The only way to clean these out without third party software is by using the "-PURGE" command on the command line, (not through PURGE) and you need to specify RegApps. (RegApps are NOT purged under the ALL).

Friday, September 26, 2008

AutoCAD 2009 Update #2

When I opened up my AutoCAD this morning, I had a little message pop up telling me that I had update information. I was pretty surprised, it seems like I just updated my software! But when I clicked on it, there it was, Update #2. I guess you could call these the Updates formerly known as Service Packs.
If you do not see a pop-up, the picture on the right shows you how to get new updates.

Here is the link to the "Read Me" file
In this link you will find important information about who should install this update and what it fixes, as well as instructions for its installation in network situations. All good info!
Here is the link to the Update for AutoCAD 2009.
Here is the link to the Update for AutoCAD LT 2009.
I copied a list of the things this service pack, oh I mean Update, will improve. I'm quoting from the Readme page.
Updates have been made in the following commands and features:
3DORBIT - Annotation Scaling - Blocks - HATCH - LAYER - MATERIALS - Menu Browser - OPEN/SAVE - PLOT - Properties Palette - PUBLISH - RENDER

I'm quite glad to read this, because I've had quite a few calls about some problems in these areas. Now I hope that just by installing this Update, those problems will just go away and leave us alone!
Below is a list I copied from the Read Me file of defects that have been fixed- I'm only including the ones specific to Update 2.
If you don't have time to read all this, just scrolling down to scan through the number of things this Update will fix should be enough to make you realize that it fixes an awful lot of problems!

And let's keep this in perspective - even though we all complain about software problems, Autodesk does always work hard to keep improving their software. Moreover, this update is free, and it fixes many problems. Don't you wish the banking system could just issue a patch and all these scary economic problems could be fixed too? Or that the 'patch' they're working on wasn't quite so expensive?

The following defects have also been fixed:
3D Navigation Tools:
When you use the ViewCube in some drawings, AutoCAD freezes.

.NET API :
If you create a wipeout object through .NET API, a fatal error may occur.
* Annotation Scaling:
The scale of annotative text changes when you use LISP entmod() to change the properties of the annotative text.
Attributes:
When a drawing contains xrefs, the -ATTEDIT command fails.
* Autodesk Buzzsaw:
In the File Navigation dialog box, when you use the Add a Buzzsaw location shortcut option, AutoCAD crashes.
* Blocks:
When you copy and paste a dynamic block, associative hatches do not work.
After you redefine a block definition, associative hatches in dynamic blocks display incorrectly.
When you open a drawing, a polyline in a block may have a very large width.
After you open a drawing, some dynamic blocks lose their dynamic properties.
* Data Extraction :
Data Extraction cannot finish operations in some cases.
The Data Extraction Combine Record Mode > Sum values option does not work correctly.
* DGN Support:
When you import some DGN files, AutoCAD crashes.
* DIM:
If alternate units is on and you edit dimension text, the alternate units text is duplicated.
* Export a Layout to Model Space:
If .NET 3.5 Service Pack 1 is installed and you use the EXPORTLAYOUT command on some layouts, AutoCAD may stop responding.
* Find:
The FIND command performs slowly when you search for text.
* Groups:
Rollover highlighting does not go away.
* Hatch:
When you bind a drawing with an xref that contains annotative hatches, AutoCAD crashes.
* Hide/Shade:
When you use the HIDE command with a drawing that contains text, some objects may not be hidden.
* Image:

When you attach a corrupted raster image to a drawing, AutoCAD crashes.
* Layer:
When you zoom to a locked viewport, the Layer palette updates
* Layouts:
When you attempt to switch layouts in drawings, an Out of Memory crash may occur.
* Materials:
When you import a 3DS file with texture, AutoCAD may crash.
* Menu/Toolbar:
Some menu macros do not work.
* Multileader (mleader):
Mleader custom arrowheads are not brought over to the drawing from the Tool palette.
* Multiline Text (mtext):
When you edit mtext in a viewport, it may be duplicated in other viewports.
* Object Snaps:
Osnaps on polylines and mesh objects do not work correctly.
* Plot:

When you plot upside-down, an OLE object does not plot correctly.
A drawing that contains hatches and gradients may plot slowly.
When plot area is set to View, AutoCAD LT may crash.
* Publish:
When you attempt to publish multiple sheets with PUBLISHCOLLATE=1, only the first sheet of the set is plotted.
* Quick Properties:
When you edit multiple mtext objects through the Quick Properties palette, AutoCAD crashes.
* Render:
When you render some drawings, AutoCAD runs out of memory.
* Ribbon:
If the ribbon is displayed and you select portions of a mtext object that contains multiple formats, the mtext object becomes distorted.
* Selection:
When you select objects in groups, AutoCAD may crash.
* Tables:
When you edit text with space before or after the text within a table cell, AutoCAD crashes.
* Text:
When you move text to a new position within a drawing, it disappears.
* Tool Palettes:
When you attempt to edit the properties of multiple Tool Palette tools, an Out of Memory crash may occur.


If you actually read through all these, you can understand why I only included the fixes for this second update. This is plenty long without including everything from service pack 1! There's a lot more important information on that readme page, so go take a look.

I sincerely hope that this update will really make your drawing time go better. And it didn't even cost 700 billion dollars!

Tuesday, September 16, 2008

AutoCAD 2009 View Cube

Have you ever felt like you were lost in space?
Autodesk really came up with a winner when they decided to add the View Cube in AutoCAD 2009! Any of you who've ever worked in three dimensional drawings know just what I mean. You're drawing and moving around and somehow you think you're looking from the top when actually you're underneath your drawing! (This has the potential to mess things up in spectacular ways)

With the new view cube, that won't happen anymore.
When you're in the 3D workspace, the button to turn on the Viewcube is on your home tab, in the View panel.


As you can see from the next few images, clicking on the various parts of the cube will change your view of the drawing to correspond with whatever part you picked.


Notice here I picked a corner of the cube


Here I picked one of the edges, on the side of the cube


Here I picked a face of the cube


Now watch what happens when I hit that arrow that only shows while I'm viewing the model from the side view, as you saw in the last picture. You can see from this picture how those arrows rotate your model.


And if you use 3D Orbit, the cube rotates with your model so you always know where you are. You just gotta love it.
This was so easy to explain, yet it saves sooooo much hassle when you're drawing in 3D. What an elegantly simple solution!

Monday, August 18, 2008

AutoCAD 2009 Quick Access Toolbar

Hello everyone, how's the weather in your area? In Colorado we've had a lot of really hot weather for the past few weeks, in the high 90's every day (like 35-37 C) but this past Saturday it rained. Saying "it rained" really doesn't give you a picture of it, it RAINED, it just poured - buckets of rain! It's been so dry here, we did badly need the rain - but why did the only day of rain have to be on the only day this summer I was helping with an outdoor art show?

If the new ribbon interface is affecting your life like a rainstorm, perhaps this little message will bring some sunshine back!
Specifically today I'm going to talk about the Quick Access Toolbar, which is the new toolbar that sits up on top of all the other ones, no matter what workspace you're using.
There are 3 things you see if you right-click on the Quick Access Toolbar, and all of them are best found that way; 1. Customizing the Quick Access Toolbar, 2. Showing your old menus, and 3. Turning on toolbars.
Yes, you can even turn on toolbars & menus when you're in the new workspace with the ribbons! You can have it all!
Do you remember I said I wanted "Save as" in my quick Access toolbar? Well, look at the picture - I got it, and it was super simple.

1. Customize
Right click on the Quick Access Toolbar, pick "Customize..." and a menu pops up. Once you start typing in the search bar, every command containing those letters will show in the box at the bottom. Once you find the one you want, put your mouse on the icon and drag the button up onto the Quick Access Toolbar, and there it is. However, then you need to save your workspace so it stays; these customizations are saved per Workspace. (I blogged about Workspaces, you can look that up)


2. Menu Pulldowns

If you hate going through the Menu Browser for commands that used to be on your pulldown menus, you can get them all back by right-clicking on the Quick Access Toolbar and pick that option.


3. Toolbars

If you want to see a toolbar, but you like the ribbons and don't want to regress to AutoCAD Classic Workspace, you can. Right click on the Quick Access Toolbar and choose "toolbars". Just like before, you'll see a list of all your toolbars, and checking any one of them will turn it on. You can dock toolbars on the sides, or just under your ribbon, and you can create a new named workspace to save this arrangement of ribbons and toolbars.


You can arrange these tools any way you want to!
Is it my imagination, or did the sun just come out?