 Welcome to the first installment of the Civil 3D CAD Café. The first thing I would like to do is to introduce myself. My name is Brian Hailey. I graduated from Colorado State University with a Bachelor of Science in Civil Engineering. I’ve worked as a civil engineer for the past eight years on a variety of different projects. And, just in case you thought I might actually have a life, I am also a licensed Professional Engineer in the State of Colorado. Since coming to Comm-Tech, I’ve been certified as an Implementation Certified Expert for Civil 3D and my life pretty much revolves around Civil 3D (oh yeah, and my wife and three boys).
Well, let’s just jump into the meat of things. In this edition of the Comm-Tech Civil 3D CAD Café, we’ll be discussing parcel labels and how to apply them to subdivisions that are laid out in a lot and block pattern. Parcels, as you may or may not know, cannot have duplicate numbers. This makes it challenging on a lot and block layout because you may have several parcels that are “Lot 1” but in different blocks. What this means is, you can’t simply create a label that adds the word “LOT” in front of the parcel number.
The solution I use in this situation is a unique number scheme for these lots. The parcel number is a compound number, the first digit(s) is the block number and the last two digits are the lot number. For example, Lot 1, Block 2 has the parcel number 102. I’ll refer to this structure as BBLL. We then create an expression to label just the portion we want.
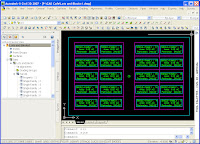
I’ve created an extremely simplified parcel layout consisting of two blocks, each with ten lots.
Now, the first thing we have to do is create two expressions. These expressions will strip off the portion of the parcel number we need for the label. The first expression I will call BLOCKLOT to BLOCK. This will convert the parcel number from the BBLL format to BB.
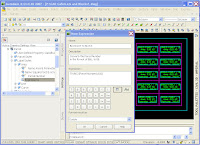
What this expression does is to take the parcel number, “BBLL” and divide it by 100. This results in “BB.LL”. It then Truncates this resulting value and we are left with “BB”. We can now use this expression anywhere we want to label just the Block number. Likewise, we can use an expression to convert the parcel number from the BBLL format to LL. I called this expression BLOCKLOT to LOT.
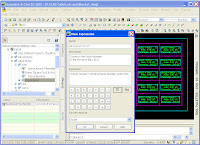
This expression is a little bit trickier but not too bad. In essence, we use the same expression as before to get the block number, “BB” but now, we multiply it by 100 to get “BB00”. We then subtract this from the original number to get just the lot number, “BBLL - BB00 = LL”.
Now that we have our two expressions, we can use them in a parcel area label style. I created a new label style and edited the text component. Since we have made these expressions, they are available to us to use in the text component.
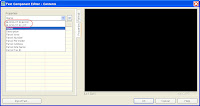
This is what the final composition of the text component of our new label looks like:
Now that we have our label style all set up, we simply apply this style to the parcels we need labeled. The result looks like this:
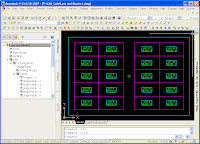
As you can see, we need to renumber our parcels to match our new labeling scheme. The block to the left is Block 1 and on the right is Block 2. In our Renumber/Rename Parcels dialog box, we set the starting number to 101, corresponding to Block 1, Lot 1.
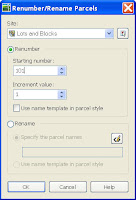
And then select our parcels in order. We then repeat the process for Block 2 using a starting number of 201 to correspond to Block 2, Lot 1.
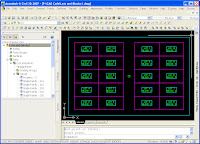
Our final product now looks very much how we would like to see it.
Our final product now looks very much how we would like to see it.
I hope you’ve enjoyed this issue of the Comm-Tech CAD Café.


No comments:
Post a Comment