Hi again! This time let's look at how to customize the Dashboard.
I know it's hard to change the way you've always accessed your commands, so I thought perhaps if you knew you could customize the Dashboard to look the way you want it, you all might just give it a try.
Now in 2008 they've added it to the Workspace named '2D Drafting and Annotation'. They've also added a lot of functionality; you can customize your Dashboard now like you could the toolbars, and since they hide themselves when you don't need them, you can maximize your drawing space. (I mean it doesn't have to be all filled up with toolbars any more.)
Each of those rows with the faint grey line underneath is a control panel. You can control which control panels show. Right click on any control panel, you'll see the list of available panels. Only the ones that are checked will show. So, the first way you can customize the user interface

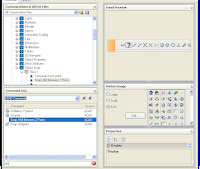
To open up the list of exising Dashboard panels, in the top left section of the CUI dilaog box, where it says "Customization in all CUI files" click the "+" in front of "Dashboard Panels". Right click exactly on those words and one of your choices will be "New". I selected that, in this picture you'll see my new panel.
One way to add commands to my panel is to find them from the list on the bottom there, and just drag them one at a time onto the Control Panel. If I wanted to, for example, I could drag every different Arc command onto one Control Panel and have them all at my fingertips.
By right-clicking on your Control Panel, you can add another row, a separator or a flyout; duplicate an object, or remove it.
Another, faster way to make Control Panels is to drag an entire toolbar onto a Control Panel. Up in the top section, find a toolbar that has most of the commands you want, and just drag and 

Also, by right-clicking on individual buttons, you can delete any you don't want.
The fun part is adding new commands to these. Any command that you can find in the bottom left section of the CUI box can be dragged onto any dashboard. In the next illustration, I dragged a command from Express Tools that doesn't have an icon 
Also notice in the lower right corner, all the icons used for Toolbars and menus are showing there. It's not hard to customize one of those to make your own icon.
Scroll through the icons until you find one that's close to what you would like for your command. For the following example, I dragged the command for snapping Midway between two points onto my toolbar, so I started with the icon for Osnap-midpoint. In the picture below 
Once you've saved it, the icon shows in your list, so all you have to do is scroll down to the bottom of the list and select it. Then it'll show up on your Control Panel.
By the way, if you don't use the 
Here is another custom button I made, for the Express Tools command "Replace block with another block". In this illustraton you can see the path where my custom icons are saved by default. Using this default location makes it easy for you to transfer these next time you upgrade the software.
Last of all, if you want to assign an image to the Control Panel itself, it's as easy as pie. Click on the title of your dashboard, scroll through the icons and click one. It'll then be assigned to the edge of your control panel. You don't have to do that of course. I made a custom one, and perhaps I shouldn't have used red, since all the other icons are just shades of blue. What can I say ? - I like a lot of color!


No comments:
Post a Comment