
Annotative Dimensioning works pretty much the same as Annotative Text, but while playing with it I've noticed a few things that can be a little confusing.
( a little confusing?)
So hopefully after reading this, some of the fog will clear away, and this new feature will make your life as much easier as you were anticipating. No more extra layers for every viewport scale!! No more worries about forgetting to turn off or on the correct layer per viewport!
To create an annotative dimension style from an existing style, do the usual steps to create a new style, and start with one you use all the time. In your Dimension Style Manager, on the Text tab, the text height will be the height you want it to print in Paper Space. On the Fit tab, where you have always put in the scale factor there is now a choice for Annotative. Just check that box and there you have it, a new annotative dimension style.

A little note about naming these styles - the new annotative symbol shows up in the Styles toolbar pulldown list in front of the style name, so you'll know right away whether you're choosing an annotative style or not.
The Style name doesn't have to have the word "annotative" in it - kind of nice, since those style names can get too long to see in the pulldown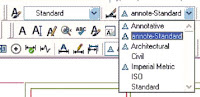
The Style name doesn't have to have the word "annotative" in it - kind of nice, since those style names can get too long to see in the pulldown

The easiest way to have your annotative dimensions always turn out right is to create your viewports and set them to the correct scale first. Now you can lock your viewport from the status bar, with your viewport selected just click on the padlock on the status bar.
 Next, use the Maximize Viewport button - also on the status bar - and then you're in model space, as if you jumped through the viewport. You can pan and zoom all you want and it won't change your viewport scale - even if you forgot to lock it. Add your dimensions, and then use the same button to go back to paper space.
Now I've added a new viewport scaled to 1/4" = 1'-0", but notice you can still see the 1/8" scaled dimensions. If you've done this, you might have thought they don't work the way you  want them to - not so fast! Look at the bottom of this picture and you'll notice the annotation scale doesn't yet match the VP scale.
 want them to - not so fast! Look at the bottom of this picture and you'll notice the annotation scale doesn't yet match the VP scale.
 It's a simple fix - with the new viewport selected, click on the Annotation Scale flyout, and set it to the proper scale - zip zap zowee, all those dimensions go away. Notice also that the text is now the same height in both windows.

I used Maximize Viewport to go in and add a couple dimensions I want in my 1/4"=1' scaled window. All my dimensions (and text) will print out the same size
 on the paper! Yeeehaw!*
 But what if I want a certain dimension to show in more than one window? There's an easy way, and a way that can really mess you up.
 The easy way is to click into the viewport where the dimension already shows, so you're in model space. If you locked it, no worries about messing up your scale! Select the dimension you want to add to a differently scaled viewport, right click, and find "Annotative Object Scales", and then "Add or delete scales." Choosing "Add" will bring you to a dialog box showing all the scales available. Click on the one you want, in my case 1/4"=1'-0", and immediately it shows up in the viewport with that scale.
This is cool beans.

Next time I will show you the way to add more scales to your dimensions and text that can really mess you up if you're not careful! Maybe the title should be "How Not to Use Annotative Annotations".
*Ok, I'm sorry for the yeehaw. Last weekend I brought my son to Nashville for Dukesfest, a car show & reunion for fans of the Dukes of Hazzard TV show, and there was a lot of Yeehaw-ing going on. It was really fun, I have to admit.


No comments:
Post a Comment